Audio Equipment Flipping: Test, Price, Pack & Sell
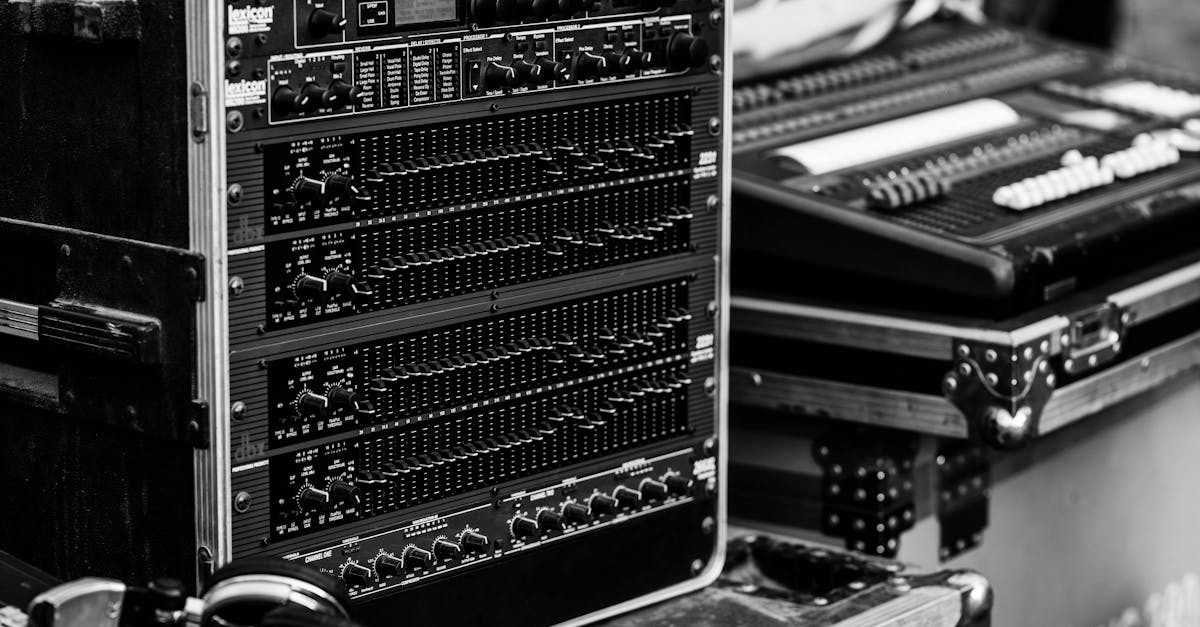
By the Numbers
Store ratings checked Sep 27, 2026. How we count
Audio equipment is worth flipping when you can identify the exact model, prove the important functions, find comparable sold units in the same condition, and move it without letting fees, repairs, or shipping damage erase the spread.
The brand name is not enough. A desirable receiver with a dead channel, a premium speaker with a rubbing voice coil, or a turntable missing its cartridge can be a good project and a bad flip at the same time. The edge comes from reducing uncertainty before you pay.
This guide gives you a repeatable system for receivers and amplifiers, passive and powered speakers, turntables, headphones, microphones, and audio interfaces. It deliberately avoids permanent “this model is worth $X” lists. Used prices move, condition changes the buyer pool, and accepted offers are often different from visible asking prices. Check current sold evidence for the exact unit in front of you.
The 60-Second Buy-or-Pass Screen
Do not start with the logo. Start with six questions.
| Check | Buy signal | Pass or project-price signal |
|---|---|---|
| Exact identity | model, variant, voltage, and serial label are readable | label missing, altered, or inconsistent |
| Completeness | proprietary remote, power supply, equalizer, cartridge, covers, and cables are present | expensive or model-specific pieces are missing |
| Safe test | seller allows a controlled test with known-good accessories | “powers on” is the only proof |
| Current demand | multiple same-model sales in the same condition and market | only active listings, rare one-off sales, or parts units |
| Exit route | parcel size, packing plan, and selling platform are known | dimensional weight or fragility is still a guess |
| Margin | conservative proceeds clear repairs, costs, and required profit | profit depends on the highest comp or a perfect repair |
If you cannot answer three of those at the point of purchase, price the item as untested inventory, not as a working collectible.
Identify the Exact Version Before You Comp It
Audio products often reuse a family name across several versions. One suffix can change the voltage, generation, included amplifier, driver layout, connection type, or buyer compatibility. A sold result is useful only when it represents the same thing you are holding.
Build the identity from physical evidence in this order:
- Rear or bottom model plate: capture the full model, electrical rating, voltage, serial number, and regulatory labels.
- Front-panel configuration: compare the input names, control layout, display, badges, and finish with the manufacturer’s manual or archived product page.
- Connection panel: count inputs and outputs. HDMI generation, balanced versus unbalanced connections, speaker impedance, USB type, and proprietary ports can distinguish revisions that look identical from the front.
- Included components: identify the remote, setup microphone, equalizer, companion speaker, external power supply, headshell, cartridge, wall mount, or wireless transmitter by its own part number.
- Regional version: confirm mains voltage and plug type. A 100-volt Japanese-market component is not interchangeable with a 120-volt US version simply because the faceplate matches.
- Pair or set status: determine whether a speaker listing represents one cabinet, a matched pair, a powered master plus passive companion, or part of a proprietary surround system.
| Category | Identity details that change the comp | Common false match |
|---|---|---|
| receiver or amplifier | exact suffix, wattage version, voltage, faceplate color, wood case, remote, service documentation | lower-powered sibling with the same chassis design |
| passive speakers | pair versus single, driver revision, impedance, finish, consecutive or close serials, original grilles | replacement driver, empty cabinet, or one speaker from a pair |
| powered speakers | generation, master/companion side, voltage, input module, included interconnect | passive version with the same product name |
| turntable | mark or generation, automatic/manual version, cartridge, headshell, voltage, dust cover | replacement platter or a parts unit missing the counterweight |
| headphones | wired/wireless generation, connector, colorway, regional model, accessories | ear pads, case, cable, or counterfeit using the same name |
| microphone or interface | connector type, channel count, USB/Thunderbolt generation, bundled license eligibility | legacy version that no longer supports the buyer’s operating system |
When the label is missing, do not reverse-engineer a premium identity from appearance alone. Search the control layout and connection panel, but keep the listing and buy price conservative until another reliable identifier confirms the model.
Build an accessory gap before you build a price
Missing accessories affect audio gear unevenly. A generic RCA cable is trivial. A proprietary remote, calibration microphone, external crossover, Bose 901 equalizer, detachable control pod, unusual power supply, turntable counterweight, or speaker linking cable can determine whether the product is usable.
Before buying, search each missing part by its part number and check both availability and sold price. Then choose one of three treatments:
- replace it before listing and include the replacement cost in the buy ceiling;
- sell without it, using sold comps for similarly incomplete units;
- pass because the missing piece prevents a credible functional test or shrinks the buyer pool too far.
Do not assume the buyer can “just find one online.” If you could not find the correct part while researching the purchase, the buyer will have the same problem.
Pick a Beginner-Friendly Audio Lane
Learning every audio category at once is expensive. Choose a lane whose test equipment, storage, and shipping demands fit your operation.
| Lane | Why it is learnable | Skill to develop first | Scaling constraint |
|---|---|---|---|
| wired headphones | quick channel test, compact storage, inexpensive packing | authenticity and pad/hinge inspection | hygiene, cable faults, counterfeit risk |
| small interfaces and microphones | exact models, repeatable port tests, specialist demand | driver compatibility and signal-chain testing | software licenses and phantom-power requirements |
| compact passive speakers | visible construction, simple known-good amp test | driver-by-driver listening and pair matching | dimensional shipping and cabinet damage |
| modern receivers | clear model plates and broad local demand | feature compatibility, remote/setup completeness | rapid standard obsolescence |
| vintage receivers | strong specialist interest and parts demand | safe signal-path testing and service-history language | weight, repair uncertainty, fragile shipping |
| turntables | visible completeness and enthusiast demand | tonearm, speed, cartridge, and transport setup | delicate moving assemblies and hidden stylus wear |
A useful starting lane is one where you can test every important function yourself. If every purchase requires a technician, your sourcing speed, repair reserve, and cash cycle depend on somebody else’s queue.
Price Audio Gear With Sold Evidence, Not Asking Prices
Two first-party research tools cover most resale decisions:
- eBay Product Research provides up to three years of sales data, actual accepted-offer prices, sold ranges, average shipping cost, and recent sell-through metrics.
- The Reverb Price Guide records completed transactions for cataloged music and pro-audio gear and lets you narrow by exact product and condition.
Current-source check, August 20, 2026: eBay’s first-party help page now labels the seller tool Product Research and places it in Seller Hub’s Research tab. Older bookmarks that use “Terapeak” wording may redirect, but the current documentation URL above is the durable citation. Reverb’s Price Guide and UPS’s packaging page also resolved during this check. Always re-open the live source before relying on a service name, time range, or carrier instruction.
Use this workflow before setting a buy ceiling:
- Photograph the model plate and search the full model number. Include a meaningful suffix, generation, voltage, channel count, or impedance when it changes the product.
- Filter to sold results. Active listings show seller expectations, not buyer decisions.
- Match condition. Separate serviced, fully tested, working-with-flaws, untested, and parts-only units.
- Remove false matches: manuals, replacement parts, empty cabinets, single speakers from a pair, bundles, and similarly named models.
- Compare total buyer cost. A lower item price with high shipping is not a lower market result.
- Use a conservative center of several relevant sales. Do not build the deal around one record price.
- Record the search date, query, condition filter, sample size, middle range, and typical shipping. That small evidence packet makes later repricing much easier.
Run three separate searches instead of forcing every result into one average:
- Exact working unit: full model and suffix, excluding parts, manuals, remotes, and empty cabinets.
- Same unit with the observed flaw: add terms for “parts,” “repair,” “no output,” “missing remote,” or the exact defect.
- Accessory and part-out floor: search the remote, driver, platter, headshell, knobs, boards, or other components by exact compatible part number.
Record all three result sets. The first sets the upside, the second prices the condition you actually have, and the third shows whether a failed repair has a credible exit. Do not combine them into one misleading average.
Reverb notes that its estimated range is based on recent sales in matched conditions, while eBay explains that Product Research can expose actual accepted-offer prices. That makes both stronger than a screenshot of current asking prices.
Grade the confidence of the comp set
Not every average is equally trustworthy. Give the comp set a confidence grade before it controls real money.
| Confidence | Evidence | How to use it |
|---|---|---|
| High | five or more recent exact-version sales in matching condition, with comparable completeness and shipping terms | use the conservative middle as the working sale price |
| Medium | three or four relevant sales, or a larger sample with modest condition/accessory differences | use the lower part of the matched range and increase the reserve |
| Low | one or two sales, older transactions, mixed versions, or unclear accepted-offer/shipping data | price as a speculative or long-hold buy; require more margin |
| Unusable | active listings, parts mixed with working units, manuals/accessories polluting results, or no confirmed exact match | do not create a working-unit valuation from this set |
Sample size is not the only issue. Five sales of serviced units do not prove the value of an untested estate-sale receiver. Ten single-speaker sales do not price a matched pair. A Reverb guide range does not override a major cabinet defect the range does not describe.
Use a comp worksheet like this:
| Field | What to record |
|---|---|
| search date | when the market was checked |
| exact query | model, suffix, exclusions, and category |
| condition group | serviced, tested working, working with flaws, untested, or parts |
| sample count | number of truly relevant sales after cleanup |
| delivered range | item price plus buyer-paid shipping where visible |
| completeness | remote, cartridge, pair, covers, cables, manuals, or cases |
| confidence | high, medium, low, or unusable |
| working price | conservative amount used in the buy-ceiling equation |
This makes the decision reproducible. If the item is still unsold in 45 days, you can reopen the same query, see what changed, and adjust without starting from memory.
Turn the evidence into a maximum buy price
Use this equation:
Maximum buy price = conservative sale price - selling fees - seller-paid shipping - packing - repair reserve - required profit
Example: your matched sales cluster around $260 delivered. Estimated fees are $36, shipping is $42, packing is $12, the repair reserve is $30, and you require $70 profit. Your maximum buy is $70. If the seller wants $140, the answer is not “maybe.” The deal does not meet your rule.
Run the numbers through the flip profit calculator, and use the negotiation range calculator when you need a cost-based offer and walk-away point.
Use a repair reserve even when the unit works
A working test reduces uncertainty; it does not eliminate it. The repair reserve covers faults that a short sourcing test may miss, return freight, replacement accessories, cleaning supplies, or the discount required when a defect appears during final testing.
Build the reserve from the actual risk:
- Low reserve: simple, compact item; every advertised function tested; no scarce accessories; inexpensive return shipping.
- Medium reserve: older powered gear, incomplete test coverage, battery uncertainty, minor control noise, or costly outbound shipping.
- High reserve: tube gear, intermittent channel behavior, unknown service history, scarce parts, corrosion, liquid evidence, shipping-sensitive mechanics, or a product that is expensive to return.
If the required reserve makes the buy ceiling look absurdly low, that is information. It means the seller is asking you to pay for certainty the item does not have.
Build a Small Audio Test Kit
Keep the kit boring and known-good:
- short speaker wire and RCA cables;
- a 3.5 mm or USB-C audio adapter that works with your phone;
- known-good compact passive speakers for receiver tests;
- known-good headphones with the correct adapter;
- a small amplifier for passive-speaker tests;
- XLR and quarter-inch cables for pro-audio gear;
- a flashlight, microfiber cloth, measuring tape, and scale;
- a surge-protected power strip;
- removable labels for marking tested inputs and channels.
Never open mains-powered equipment at a sale. Vintage receivers, tube amplifiers, powered speakers, and flash-equipped electronics can retain dangerous voltage after they are unplugged. Internal diagnosis belongs with a qualified technician. Your buying test is meant to identify risk, not repair the unit in somebody’s driveway.
Test from known-good endpoints inward
False diagnoses are expensive. A silent channel could be the receiver, speaker, source, cable, adapter, balance control, tape monitor, or selected input. Use a fixed order:
- confirm the source and test track play through your known-good headphones or speaker;
- confirm the test cable and adapter work;
- connect the item with volume down;
- test one simple signal path before adding optional features;
- swap one known-good component at a time when a fault appears;
- retest the original configuration after isolating the fault;
- write down exactly what failed and what substitution proved it.
Changing three variables at once can make a bad cable look like a repaired amplifier. A controlled substitution turns “the left side cut out” into useful evidence such as “left output remained silent after swapping known-good speaker and cable; fault followed amplifier channel.”
Receiver and Amplifier Test Checklist
“Powers on” proves very little. A useful receiver test checks the signal path.
- Confirm the voltage setting, fuse holder, power cord, and case are intact. Stop if you see scorch marks, liquid residue, a cut cord, or a strong burned smell.
- Turn the volume down before connecting known-good speakers or headphones.
- Feed a known-good source into an ordinary line input. Do not use the phono input for a phone-level source.
- Test left and right channels at low volume. Swap speaker leads to separate a bad speaker or cable from a bad amplifier channel.
- Move balance, volume, selector, tone, mono/stereo, speaker-bank, and tape-monitor controls. Note intermittent sound, crackle, dropouts, or a control that does nothing.
- Test several inputs and every speaker output you plan to claim in the listing.
- Let the unit play long enough to reveal protection-mode cycling, heat, odor, or a channel that fades.
- Check lamps, meters, display segments, remote response, tuner lock, Bluetooth, network functions, HDMI, ARC/eARC, and subwoofer output only when the model includes them.
For a modern AV receiver, compatibility can matter more than brand prestige. Record the exact HDMI standard, video pass-through, audio formats, room-correction microphone, remote, and network support. A clean unit without its proprietary setup microphone or remote may still sell, but it is not equivalent to a complete one.
Describe service history precisely
Do not call a unit “restored” because one control was cleaned. List the technician, date, invoice, measured work, and replaced parts when documentation exists. Otherwise use literal language such as “left and right channels tested for 20 minutes” or “volume control crackles during adjustment.” Specific proof is more valuable than a sweeping adjective.
Translate receiver symptoms into buying decisions
You do not need to diagnose the circuit at the sale. You do need to recognize when a symptom belongs in the working, working-with-flaws, or parts bucket.
| Symptom | What it proves | Buying treatment |
|---|---|---|
| scratch only while a control moves | the control path is noisy; it does not prove every channel is healthy | disclose and reserve for service; do not promise a simple cleaning will fix it |
| one channel returns after moving switches | intermittent signal path remains | working-with-flaws, not fully working |
| protection relay repeatedly clicks or never engages | output/power/protection fault is possible | project or parts price unless documented service resolves it |
| strong hum independent of source | power, grounding, cable, or component issue remains | isolate the cable/source once; otherwise project price |
| tuner works but line inputs do not | only the tuner path was proven | value from the functions actually tested |
| display is dead but audio is clean | audio path may work; lamps/display still require parts and labor | deduct a documented cosmetic/function allowance |
| burned smell, smoke, hot spot, damaged cord, or incorrect fuse | safety risk | stop the test and pass or buy strictly as parts |
Never spray cleaner into a live unit, defeat a fuse, bypass a protection circuit, or attach unknown speakers to “see what happens.” The few dollars saved by improvising are not worth equipment damage or injury.
Passive and Powered Speaker Test Checklist
First determine whether the speaker is passive, powered, part of a proprietary system, or one half of a master/slave pair.
Passive speakers
- Confirm the pair has matching model and serial information.
- Remove grilles carefully and inspect every driver, dust cap, surround, cone, terminal, and cabinet edge.
- Look for foam rot, separated surrounds, pushed domes, water swelling, veneer loss, pet damage, smoke residue, and mismatched replacement drivers.
- Play a familiar track at low volume, then test each driver from close range. A tweeter can be dead while the woofer makes the cabinet seem functional.
- Listen for buzzing, rattling, scraping, imbalance, or cabinet air leaks.
- Verify both speakers at the same settings. “One works” is not a pair test.
Do not push a cone aggressively to “test” it. If you know the driver design permits a gentle, even movement check, use minimal pressure with both hands. When in doubt, rely on a controlled sound test.
Powered speakers and subwoofers
Powered models add amplifier, input, control, and power-supply failure points. Test every input you will advertise, the volume and crossover controls, standby behavior, wireless pairing, the companion-speaker connection, and the unit under sustained playback. Plate-amplifier hum, protection cycling, and intermittent power are project signals.
Check whether a speaker is still original
A recognizable cabinet does not guarantee original drivers. Compare driver layout, part numbers, cone material, dust-cap shape, mounting holes, terminal plate, and crossover access with a reliable manual or manufacturer image. Fresh screw marks, mismatched fasteners, an adapter ring, different driver frames, or one cabinet that sounds much brighter can indicate a replacement.
A replacement driver is not automatically bad, but it changes the comp. Buyers seeking a matched vintage pair may discount non-original parts heavily, while a practical local buyer may care mostly about balanced sound. Photograph the driver labels when they are accessible without risky disassembly and describe replacements literally.
For a pair, also compare cabinet finish, grille fabric, badges, feet, terminals, and serials. A “pair” assembled from two different revisions can have different drivers or crossover networks even when the model name matches.
Turntable Test Checklist
Turntables are easy to damage and easy to misdescribe. Identify the exact version and check:
- platter starts, stops, and reaches each speed;
- pitch control and strobe behave normally when present;
- belt is not slipping, stretched, or melted;
- tonearm bearings move freely without obvious play;
- cueing platform raises and lowers smoothly;
- anti-skate, counterweight, headshell, cartridge, stylus, mat, hinges, dust cover, feet, and power supply are present;
- automatic start, return, and size selection complete a full cycle when applicable;
- both audio channels play without persistent hum.
Treat an unknown stylus as a consumable. Do not promise stylus life you cannot verify. For shipping, remove and secure the platter, counterweight, headshell or cartridge when the design permits, protect the stylus, lock the tonearm, and prevent the dust cover from carrying impact. Follow the manufacturer’s transport instructions when available.
Separate a turntable problem from the rest of the system
Persistent hum can come from the cartridge, headshell contacts, RCA cable, ground wire, phono preamp, receiver input, or household power. Low output may simply mean a phono-level signal was connected to a line input. Test with a known-good phono stage when the turntable does not have one built in, and do not call the cartridge bad until the rest of the signal chain is controlled.
Speed complaints also need context. Verify the correct belt path, mains frequency or regional version, pitch control position, and strobe interpretation before concluding that the motor is failing. If you cannot establish correct speed with confidence, list the observed behavior rather than an unsupported diagnosis.
Before buying a turntable to ship, confirm you know how each moving assembly will be removed or restrained. If the platter cannot be secured, the tonearm lock is broken, or the counterweight cannot be removed without a manual you do not have, local pickup may be the only responsible exit.
Headphone Test Checklist
Headphones are easier to ship, but modern models add battery and counterfeit risk.
- Match model, color, generation, and serial information.
- Inspect headband cracks, hinge play, cable entry, pads, odor, and corrosion.
- Test left/right balance, both wired and wireless modes, microphone, buttons, charging, multipoint pairing, and noise cancellation when included.
- Check whether the app recognizes the model and whether firmware can be updated.
- Run the battery long enough to catch rapid drain; do not convert a short test into a precise battery-health claim.
- Compare included case, cable, adapter, and power accessories with the manufacturer’s package list.
For frequently counterfeited products, low price is not authentication. Photograph labels and serials, compare construction and packaging with manufacturer guidance, and sell as authentic only when you have adequate proof.
Clean headphones without damaging them
Use the manufacturer’s care instructions when available. In general, remove replaceable pads only when the design permits it, keep liquid away from drivers, ports, microphones, and charging contacts, and avoid solvents that can cloud plastic or strip coatings. Photograph deteriorating pads before removal so the buyer understands the original condition.
Odor can be harder to solve than visible dirt. Smoke, perfume, mildew, and skin-oil contamination can remain in foam and headbands after surface cleaning. If replacement pads and headband parts are unavailable or the smell remains, do not grade the item from photos alone. Disclose it or pass.
Microphone, Interface, and Studio-Gear Checks
Dynamic microphones need a clean signal, secure connector, intact grille, and consistent output. Condenser microphones require the correct phantom-power setup. Audio interfaces need driver and operating-system compatibility, clean gain controls, working inputs and outputs, headphone monitoring, USB or Thunderbolt connectivity, and any proprietary power supply.
For each input, record what source and cable you used. For each output, record what headphones, speakers, or meters confirmed the result. Buyers of studio gear respond well to a short test matrix because it answers the question that “works great” does not: what exactly worked?
Confirm software and license transfer before valuing a bundle
Some interfaces, controllers, wireless systems, and digital mixers depend on current drivers, control software, account registration, or transferable licenses. Check the manufacturer’s support page for the exact hardware revision and the operating systems it supports. A physical interface can pass audio and still be a poor buy if the buyer cannot install the required control software.
Treat bundled software as having no resale value until the platform explicitly allows the license to transfer and the seller can complete that process. “Includes software” is not evidence when the activation code has already been redeemed.
Where to Source Used Audio Equipment
The best source is not necessarily the cheapest. It is the source where you can identify the product, test enough functions, and buy below a risk-adjusted ceiling.
| Source | Typical advantage | Evidence to collect | Main trap |
|---|---|---|---|
| estate sale | complete systems, manuals, remotes, cabinets, and service receipts may still be together | photograph the full setup before components are separated; ask where accessories and paperwork are stored | assuming long ownership means recent service or current function |
| thrift store | low acquisition cost and frequent misclassification | test policy, return policy, model plate, included accessories, and outlet availability | buying because the badge is famous when test time is limited |
| local marketplace | direct questions, controlled pickup test, no parcel shipping | ask for rear-panel/model photos and a short function video before driving | negotiating from a vague listing before confirming identity |
| garage sale | flexible bundle pricing and household context | look for manuals, remotes, cables, records, speakers, and the original system nearby | paying individually before asking what else belongs with it |
| pawn or used-music shop | equipment is often powered and accessible | confirm return window, included parts, and what the shop actually tested | narrow margin because the seller already researched the model |
| online auction | wider selection and overlooked lots | total bid with buyer premium, tax, handling, shipping, and test language | treating “untested” as secretly working or ignoring packed shipping cost |
| repair shop or technician | accurately described projects, parts units, and service history | invoice, failed diagnosis, removed parts, and ownership of replaced components | valuing a repairable unit as repaired before the work is complete |
Send a pre-pickup evidence request
For a local listing, a good message saves wasted drives without asking the seller to become a technician:
Could you send a clear photo of the model/serial label, the rear connections, the power supply or cord, and everything included? If it is already connected, a short video showing power-on and sound from both channels would help. No need to open the unit.
Then ask one category-specific question: whether both receiver channels play, every speaker driver produces sound, the turntable completes a start/return cycle, the headphones charge and pair, or the interface is recognized by a computer. A seller who cannot test may still have a good item; the price must reflect that uncertainty.
Negotiate from missing evidence, not from insults
Explain the cost gap you must absorb:
I can verify the exact model, but I cannot confirm the left channel or the missing remote. Comparable fully tested units do not leave enough room at the asking price once I allow for those risks. I can offer $___ and test it at pickup, or $___ if both channels and the remote are confirmed.
This gives the seller a reason for the offer and a path to a higher number. It also prevents you from inventing “market value” when your real concern is incomplete evidence.
Decide Whether to Repair, Sell As-Is, or Part Out
Do not let the purchase price trap you into a repair. After final testing, choose the exit with the best expected return on cash and time.
| Exit | Use it when | Required evidence |
|---|---|---|
| clean and sell working | all material functions pass and cleaning does not hide defects | completed test matrix and condition photos |
| sell working with flaws | the item remains useful and the defect is specific, stable, and priceable | exact defect, affected function, and matching condition comps |
| professional repair | diagnosis is credible, parts are obtainable, technician timing is acceptable, and repaired comps justify the total cost | written estimate, repair ceiling, and post-repair test plan |
| sell untested or as-is | safe testing is unavailable but the item has identifiable project demand | untested/parts comps and literal disclosure |
| part out | assemblies have independent demand and the whole unit is uneconomic or unsafe to ship | sold evidence for exact compatible parts, labor/storage plan, and responsible disposal |
| recycle or dispose | the item is unsafe, recalled, contaminated, unsellable, or has no economic parts demand | local electronics disposal rules |
Parting out is not free money. It creates multiple listings, compatibility questions, storage bins, packing jobs, and an incomplete chassis that eventually needs disposal. Compare the total expected net with the labor and time required, not just the sum of optimistic part prices.
Three Worked Audio-Flipping Decisions
These examples demonstrate the process; they are not current value claims for a particular model.
Example 1: tested receiver with incomplete accessories
A receiver has a readable exact model, clean case, both channels working for 20 minutes, and several medium-confidence same-version sales around a $300 delivered working price. The proprietary remote is missing.
- working price used: $270, below the center of the comp set;
- estimated selling fees: $38;
- seller-paid shipping: $44;
- packing: $14;
- missing-remote allowance: $24;
- repair/return reserve: $30;
- required profit: $70;
- maximum buy: $50.
The seller wants $90. The unit is not automatically bad inventory, but it does not meet this reseller’s shipping and profit requirements. A local-only exit might change the math; a national parcel sale does not.
Example 2: speaker pair with one silent tweeter
A matched pair has original-looking cabinets and drivers, but the right tweeter is silent after the speaker, cable, and amplifier channel are swapped. Fully working pair comps are plentiful; same-model replacement tweeters are scarce and recent parts sales are inconsistent.
The correct comp group is not “fully working pair.” Price the purchase from a one-bad-driver pair or project exit. If the seller’s price assumes an easy fuse or crossover fix, pass unless you have diagnosed that exact fault and included the repair cost. The test prevented a famous badge from turning into a speculative repair.
Example 3: turntable that works locally but is unsafe to ship
A turntable reaches both speeds, plays both channels, and completes automatic return. The dust cover is cracked, the stylus history is unknown, and the tonearm lock is broken. National sold prices look attractive, but the platter is heavy and the transport restraint cannot be replaced before listing.
Use local sold evidence and a local-pickup price. Deduct for the cover, replacement stylus assumption, and narrower buyer pool. The lower gross sale can create a better expected profit because it removes oversize packing, transit damage, and return-shipping exposure.
Choose the Exit Route Before You Buy
| Item | Best default route | Main risk |
|---|---|---|
| compact headphones and interfaces | national marketplace | counterfeit claims, battery condition, missing accessories |
| collectible receivers and pro audio | eBay or Reverb with detailed tests | service-history disputes and shipping damage |
| bookshelf speakers | national only when packing math works | pair matching, driver damage, dimensional weight |
| floor-standing speakers and subwoofers | local pickup first | freight cost, cabinet damage, plate-amp failure |
| turntables | specialist marketplace or local pickup | platter and tonearm movement in transit |
| ordinary home-theater bundles | local marketplace | obsolete standards and incomplete proprietary parts |
The correct platform is the one that reaches the buyer without adding more risk than the price premium covers. Reverb can be useful for cataloged music and pro-audio gear. eBay offers broad demand and detailed research. Local pickup is often the cleanest answer for large speakers, common AV bundles, and anything whose safe box would be expensive or difficult to build. Use the local pickup versus shipping decision guide to compare buyer reach, packing, travel, no-shows, damage exposure, and return freight before committing to a route.
Compare expected net, not headline sale price
For each viable route, calculate:
Expected net = sale price - marketplace fees - promotion - seller-paid delivery - packing - expected defect/return cost
A $350 national sale can be worse than a $275 local sale if the parcel requires $55 postage, $25 in materials, more platform fees, and a meaningful chance of a damage return. Local pickup also has costs—message time, no-shows, travel, and payment risk—so include those instead of treating local as free.
Use freight or professional packing only after getting an item-specific quote. If freight consumes the buyer premium or you cannot verify how the carrier’s liability applies, the correct answer may be a smaller geographic buyer pool rather than a riskier shipment.
Pack for the Failure Mode
Measure and price the packed shipment before you buy. Carriers may charge dimensional rather than actual weight, and a second box can change the economics.
- Photograph the item working, serial label, accessories, and cosmetic condition before packing.
- Immobilize heavy transformers and protruding controls with properly fitted cushioning around the chassis, not pressure on knobs.
- Protect speaker corners, grilles, terminals, and driver faces from direct load.
- Bag the item against dust and loose packing debris.
- Use a strong inner carton with even cushioning, then an outer carton with additional separation for heavy or fragile units.
- Pack accessories so they cannot strike the equipment.
- Shake-test gently. Movement means the job is not finished.
- Buy adequate declared-value coverage when the carrier and marketplace terms make it useful, and retain packing photos and dimensions.
Original packaging helps only when its inserts are intact and designed for that exact model. Aging foam can crumble, and an original box may still need an outer shipping carton.
UPS’s current packaging guidance recommends appropriate cushioning, protection against movement, strong sealing, and a two-box method for fragile goods. Its example two-box method calls for an outer box larger than the inner box with cushioning between them. Use the carrier’s current packaging instructions and size/weight rules rather than copying a fixed material thickness from an old forum post.
Receiver and amplifier packing sequence
- Remove detachable antennas, feet, knobs, cages, tubes, or rack ears only when the manufacturer or specialist instructions support removal.
- Bag and label each removed part; never let a remote or power cord strike the faceplate.
- Protect protruding switches and knobs with a rigid bridge or void so no box load rests on them.
- Wrap the chassis evenly and use dense corner protection that supports its weight.
- Place it in a strong inner carton with no movement, then add a suitable outer carton and separation when the weight and fragility require it.
- Keep the heavy end from shifting. Large transformers make many receivers unevenly balanced.
Reverb publishes model-agnostic walkthroughs for shipping a stereo receiver and shipping an amplifier. Treat those as a starting point and follow any manufacturer-specific transport directions for the actual unit.
Speaker packing sequence
- Protect exposed drivers with a rigid, non-contact shield; do not press bubble wrap against a tweeter dome or woofer cone.
- Remove or separately protect grilles and spikes when the design permits.
- Reinforce cabinet corners and keep terminals from carrying impact.
- Pack a pair so cabinets cannot contact each other. For large or heavy speakers, separate cartons are usually easier to control than one enormous box.
- Recalculate dimensional weight for each carton and quote the buyer from the packed dimensions.
Turntable packing sequence
- Follow the manual’s transport procedure.
- Remove the platter and mat when designed to be removed; pack them flat and separately so they cannot hit the tonearm.
- remove the counterweight and detachable headshell/cartridge when appropriate;
- protect the stylus, secure the tonearm to its rest without damaging the bearings, and restrain floating suspension parts as directed;
- keep the dust cover from supporting any load and prevent it from rubbing against the plinth.
If you cannot immobilize the platter and tonearm, do not learn by shipping the buyer’s item. Choose local pickup or professional packing.
Create a Listing Evidence Packet
A strong audio listing includes:
- exact brand, model, variant, and serial or date-code detail when appropriate;
- every included accessory and every known missing piece;
- a bullet list of tested inputs, outputs, channels, controls, and test duration;
- literal flaws with close photos;
- service documentation without exaggeration;
- packed dimensions, weight, shipping method, and local-pickup option;
- a condition-specific price supported by current sold evidence.
Avoid “untested but probably works.” Untested means the buyer carries the risk. Price and describe it that way.
eBay’s current selling-practices policy requires actual-item photos for used, refurbished, or flawed products and tells sellers to specify condition and defects. Even when you sell elsewhere, that is a useful minimum standard: the buyer should see the exact unit and the exact problem, not a catalog image.
Use a repeatable audio photo sequence
- straight front view with the unit powered off;
- powered-on display or operating state;
- rear panel showing every connection and voltage label;
- model and serial label, with sensitive serial portions masked only when appropriate;
- top, sides, bottom, corners, feet, and ventilation;
- close-ups of scratches, corrosion, cracks, foam rot, damaged veneer, or pad wear;
- every included remote, cable, microphone, power supply, manual, grille, headshell, cartridge, or case;
- category evidence: both speaker drivers, turntable tonearm and cartridge, headphone hinges and pads, interface ports, or receiver display segments;
- service invoice or replaced parts when they are part of the claim;
- packed configuration for expensive or unusually fragile shipments.
A video can supplement the listing, but it should not replace a written test matrix. The buyer needs searchable, durable language describing what was and was not tested.
Write the title from identity, not hype
Use the fields a knowledgeable buyer searches:
Brand + exact model + product type + defining feature + tested condition
Example structure: Brand ABC-123 Stereo Receiver 120V - Both Channels Tested - No Remote
Do not spend title space on “RARE,” “LOOK,” or an unsupported “audiophile” label. Exact model, voltage, pair quantity, driver size, connector, generation, and missing accessory are more useful.
Make the condition description auditable
Use four short blocks:
- Included: every component in the box.
- Tested: functions, signal source, outputs, duration, and accessories used.
- Not tested: functions you could not verify.
- Known flaws: cosmetic and functional defects with photo references.
Choose the marketplace condition category that matches the actual function. A unit that powers on but cannot perform its intended function is not fully operational simply because the display lights. On eBay, the current electronics definitions distinguish used items that are fully operational from “for parts or not working” items that do not function as intended or need repair.
Answer the buyer’s compatibility questions before they ask
Depending on the category, include:
- mains voltage and plug;
- dimensions and weight;
- speaker impedance and whether the listing is one speaker or a pair;
- phono preamp requirement;
- cartridge, stylus, and headshell details;
- balanced/unbalanced connection type;
- USB, Thunderbolt, Bluetooth, HDMI, ARC/eARC, or network generation;
- supported operating systems from the manufacturer’s current support page;
- required proprietary app, remote, calibration microphone, power supply, or interconnect.
Compatibility detail reduces irrelevant traffic, pre-sale messages, and preventable returns. It also differentiates the page from a seller who copied a generic product description.
A 30-Minute Sourcing Workflow
Minutes 0-3: photograph model, serial, accessories, and obvious defects.
Minutes 3-8: identify the exact version and locate current sold evidence.
Minutes 8-15: run the category checklist with known-good accessories.
Minutes 15-20: estimate packed size, shipping, fees, and repair reserve.
Minutes 20-23: calculate the maximum buy price.
Minutes 23-27: negotiate without crossing the ceiling.
Minutes 27-30: record the test result and comp query before memory gets fuzzy.
If the seller is rushing you, the unit cannot be tested, or the exit math depends on a record sale, leave. Another piece of audio gear will appear. A bad transformer, cracked cabinet, or shipping claim can consume the profit from several good flips.
Track Results by Audio Category
Use one row per item:
| Field | Why it matters |
|---|---|
| source and date | reveals which channels produce testable inventory |
| exact model/version | prevents mixed product-family reporting |
| comp confidence | shows how often low-evidence buys underperform |
| test minutes | exposes categories that consume too much labor |
| purchase and accessory cost | captures the real acquisition basis |
| repair/cleaning cost and days | measures technician dependence and cash delay |
| packed size, weight, and materials | identifies shipping-heavy categories |
| list date, sale date, and route | measures turnover by platform |
| gross sale, fees, shipping, return cost, and net | measures actual profit rather than visible spread |
| defect discovered after purchase | improves the next checklist |
After ten sales in one lane, review median net profit, days to sale, return/damage rate, and labor time. A category with attractive gross sales can still be a weak business if it ties up a workbench for six weeks or creates repeated shipping claims.
Run a post-sale error review
For every return, damage claim, or margin miss, classify the cause:
- identity error;
- bad or polluted comp set;
- incomplete function test;
- missing accessory;
- underestimated repair;
- platform or fee error;
- packing failure;
- compatibility disclosure gap;
- price or turnover assumption.
Then add one prevention step to the relevant checklist. The goal is not to predict every failure on day one. It is to stop paying tuition for the same mistake twice.
Frequently Asked Questions
When should I sell speakers locally?
Sell locally when the packed size, cabinet fragility, or pair weight makes national shipping consume too much of the price advantage. Calculate the boxed shipment first; do not decide from bare-speaker dimensions.
How much should I pay for used audio equipment to resell?
There is no reliable percentage that works across categories. Start with a conservative exact-model sold price, then subtract marketplace fees, seller-paid shipping, packing, missing accessories, a defect/return reserve, and the profit your business requires. The remainder is the maximum buy price. If the evidence is weak or the item is untested, lower the working sale price and increase the reserve.
What audio equipment is easiest for a beginner to flip?
Start with compact, easy-to-test products that have clear model numbers and manageable shipping: wired headphones, small audio interfaces, compact passive speakers, and common microphones. Large vintage receivers can be profitable, but their service and packing risks make them poor first projects. Compare audio with the best items to flip for profit before choosing a first category to learn.
Which audio brands are worth reselling?
Brand is a lead, not a verdict. Marantz, Pioneer, Sansui, Technics, Yamaha, JBL, Klipsch, KEF, Bowers & Wilkins, Shure, Focusrite, Sony, Bose, Sennheiser, and many specialist brands all contain products with active used markets, but they also contain ordinary, incomplete, obsolete, damaged, or difficult-to-ship models. Search the exact model and version, not the logo by itself.
Sources and Freshness
Core research and listing rules were checked August 20, 2026 against:
- eBay Product Research documentation for sold history, actual accepted-offer prices, shipping metrics, and search specificity;
- the Reverb Price Guide and Reverb’s guidance on pricing used gear;
- eBay’s selling-practices policy and electronics condition definitions;
- UPS packaging guidance; and
- Reverb’s walkthroughs for shipping a stereo receiver, shipping an amplifier, and shipping pro-audio gear.
Platform rules, carrier charges, compatibility, and used prices change. Recheck the official tool, manufacturer support page, marketplace terms, and carrier rules for the exact product and transaction before buying or shipping.
Bottom Line
The best audio flip is not the most famous badge or the largest visible spread. It is the unit you can identify, test, value, and deliver with the fewest unanswered questions. Build the evidence packet first, set the buy ceiling second, and let the gear go when the seller’s price or the technical risk crosses it.
Related articles
best items to flip for profit
Best items to resell in 2026, from game consoles and outdoor clothing to high-margin small replacement parts, ranked by profit, risk, and sell speed.
sourcing vintage audio at Goodwill bins
See Goodwill bins pricing by the pound, how often bins rotate, and what to check before a trip so outlet sourcing still leaves resale profit.
DJI Drone Flipping Guide: Test, Price, Ship & Avoid Locks
Flip DJI drones with a 2026 deal screen covering FAA registration, Remote ID, DJI account binding, battery health, lithium shipping, pricing, and resale platforms.
Tools that help with this topic
eBay sold comps for vintage audio
Build source-backed sold-comp research links for eBay Advanced Search, eBay Product Research, Mercari, and Poshmark, plus a 7-comp pricing worksheet.
flip profit calculator for speakers
Calculate net profit, ROI, margin, break-even price, and target sale price after marketplace fees, shipping, reserves, and labor. Free calculator included.
electronics depreciation on vintage amps
Compare used electronics sold comps with trade-in offers. Include fees, battery health, device locks, accessories, and condition to estimate net value.
grading ROI for hi-fi gear
Shortlist PSA, BGS, SGC, or CGC by live tier constraints, then compare exact graded sold comps with the raw-card exit and all-in grading cost.